There are many types and designs of websites, but if you want a website similar to Not Phở where you can navigate from one page to another, show images and texts, and display external links, this article can help you do that.
Set up GitHub and GitHub Desktop
The first thing you need is a GitHub account and GitHub Desktop. GitHub is a hosting platform for your code and projects, and GitHub Desktop is an application that enables you to interact with GitHub to save your work.
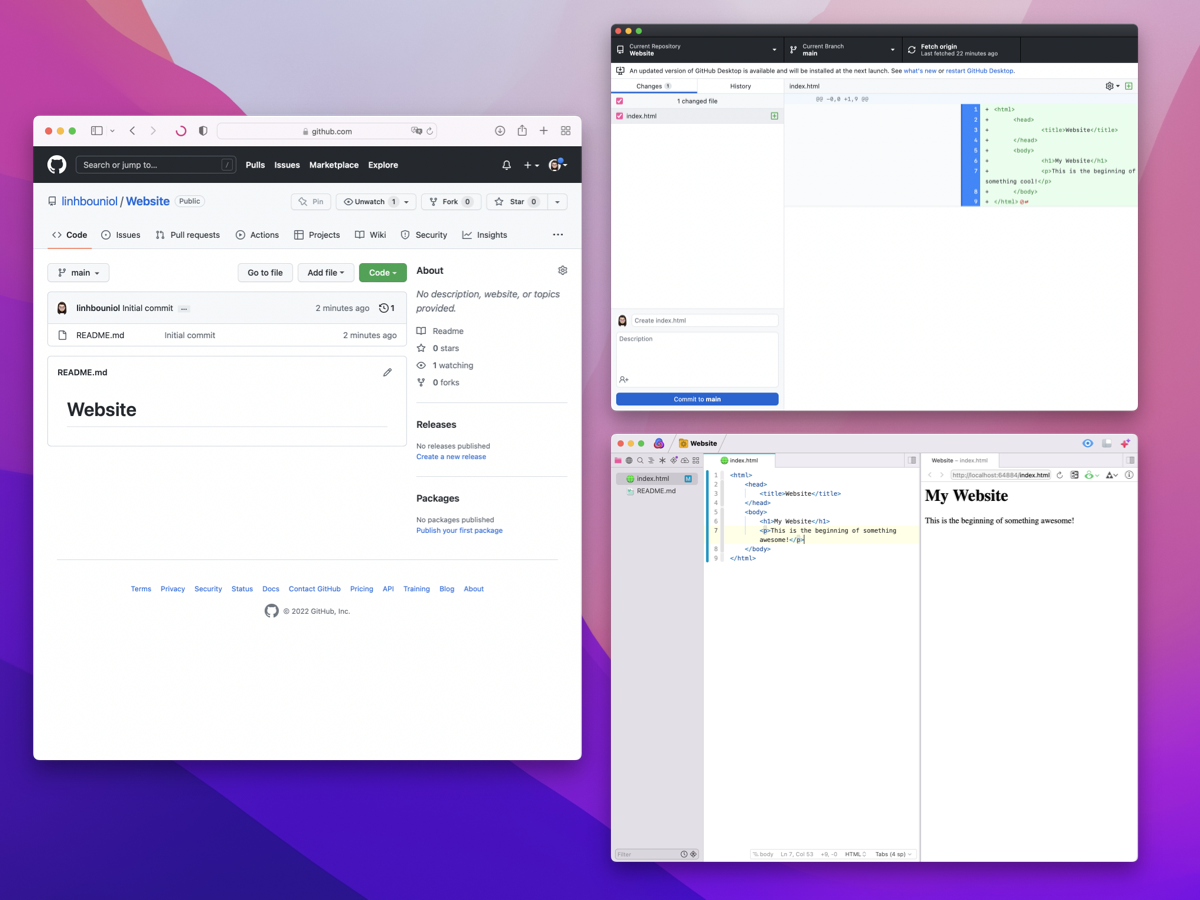
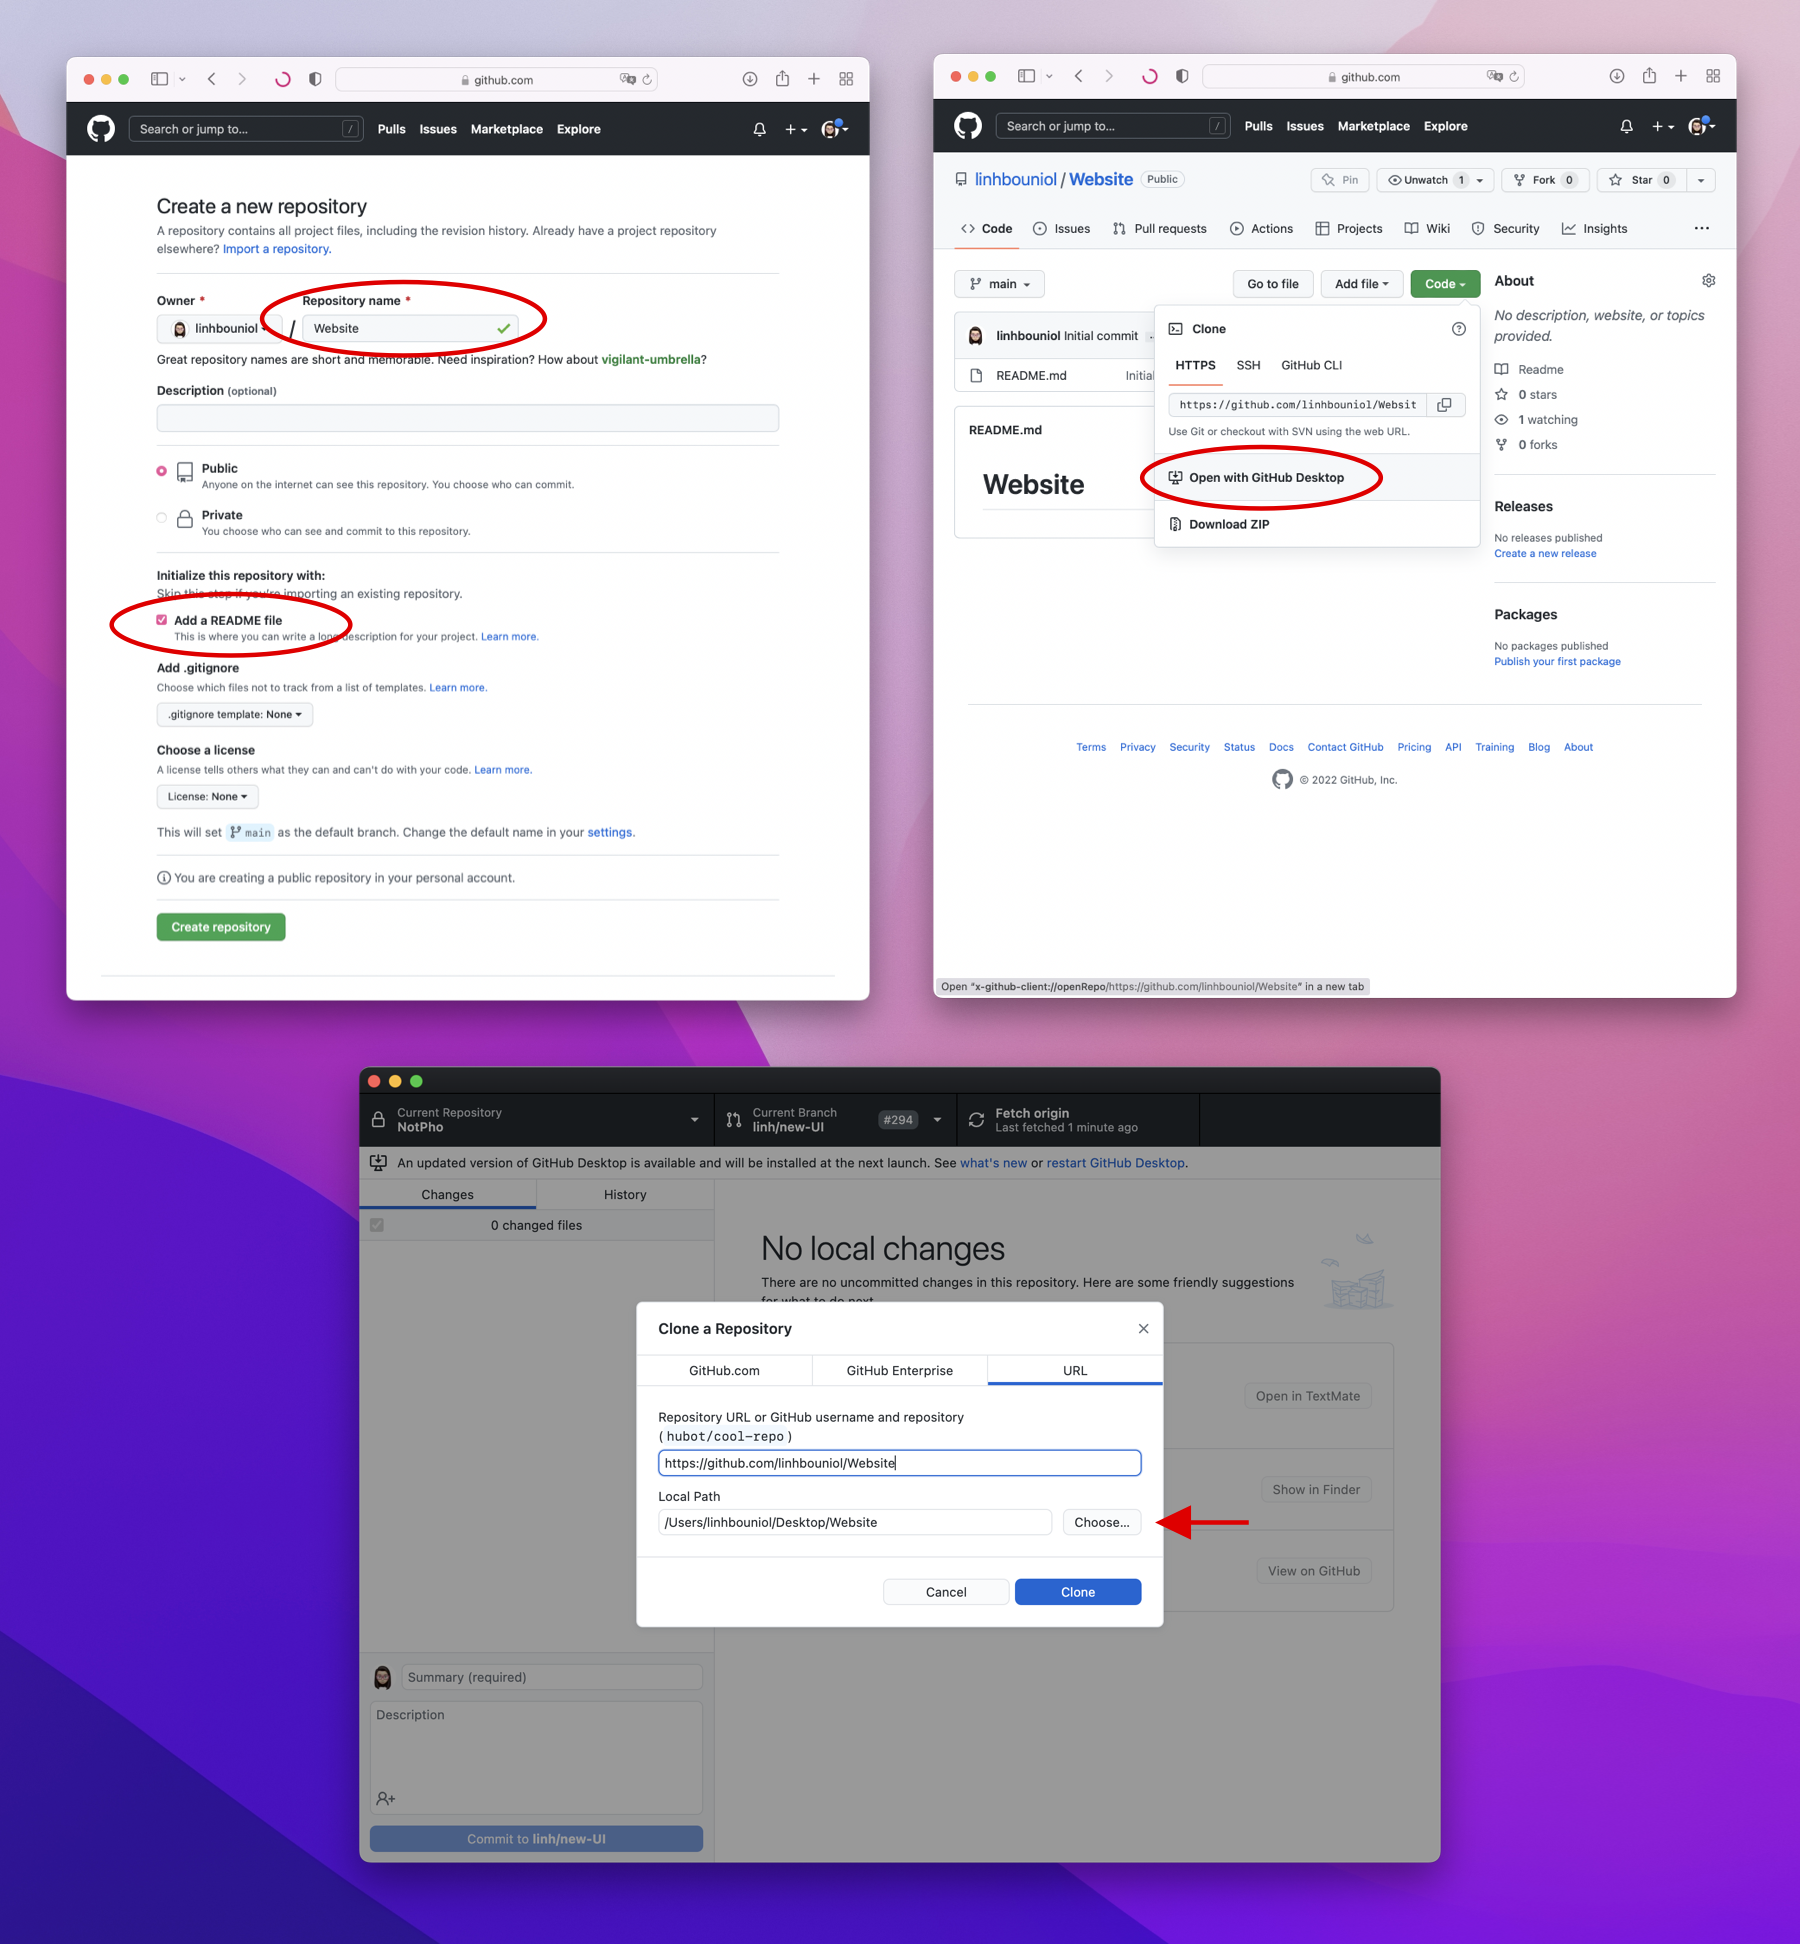
After you’ve created an account and downloaded GitHub Desktop, create a new repository (repo). Name the repo whatever makes sense to you, and check the “Add a README file” checkbox. Adding this option will make sure that GitHub will create an empty repo so you can add to it, otherwise you will have to go through many more steps to create a repo and link it back to GitHub. Once you have the repo created, you are going to clone the project to your computer and open it with GitHub Desktop. When you clone, you are duplicating that project on to your computer so you can work on it. Be sure to save it somewhere you can easily find later. Any changes you make in the future GitHub Desktop will know about and it will allow you to save your work and push those changes to the repo that exists on the GitHub server. Having your work live on GitHub is good because later you will use something called GitHub Pages to publish your website.
Learn HTML & CSS
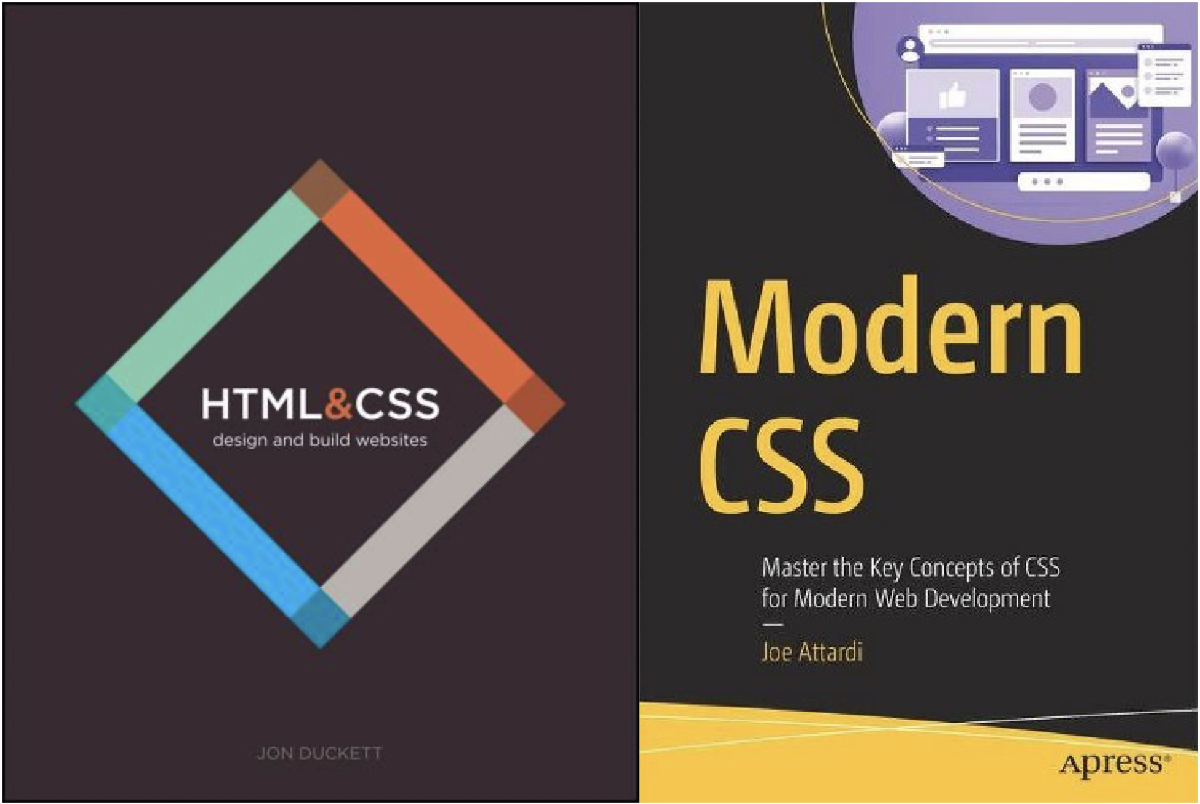
Now that you have the project all set up, the next thing you need is learn to code. If you already know how to code, then that’s great. But if you don’t, that’s okay too because it’s really easy to start. For a basic website like this one, you just need to learn HTML & CSS. HyperText Markup Language (HTML) is the language used to build out elements (text, button, image, etc…) on a website. Cascading Style Sheets (CSS) are the files used to style the elements written in HTML. The two books I used were HTML & CSS by Jon Duckett and Modern CSS by Joe Attardi. The first book is actually quite old, published in 2011, but HTML and CSS haven’t really changed much over the years so the book is still relevant. If there is any outdated content, the second book will cover them so you are pretty much good to start. There are also plenty of good examples on the internet so if there is anything in the books that you don’t understand you can definitely look it up.
Set up Nova
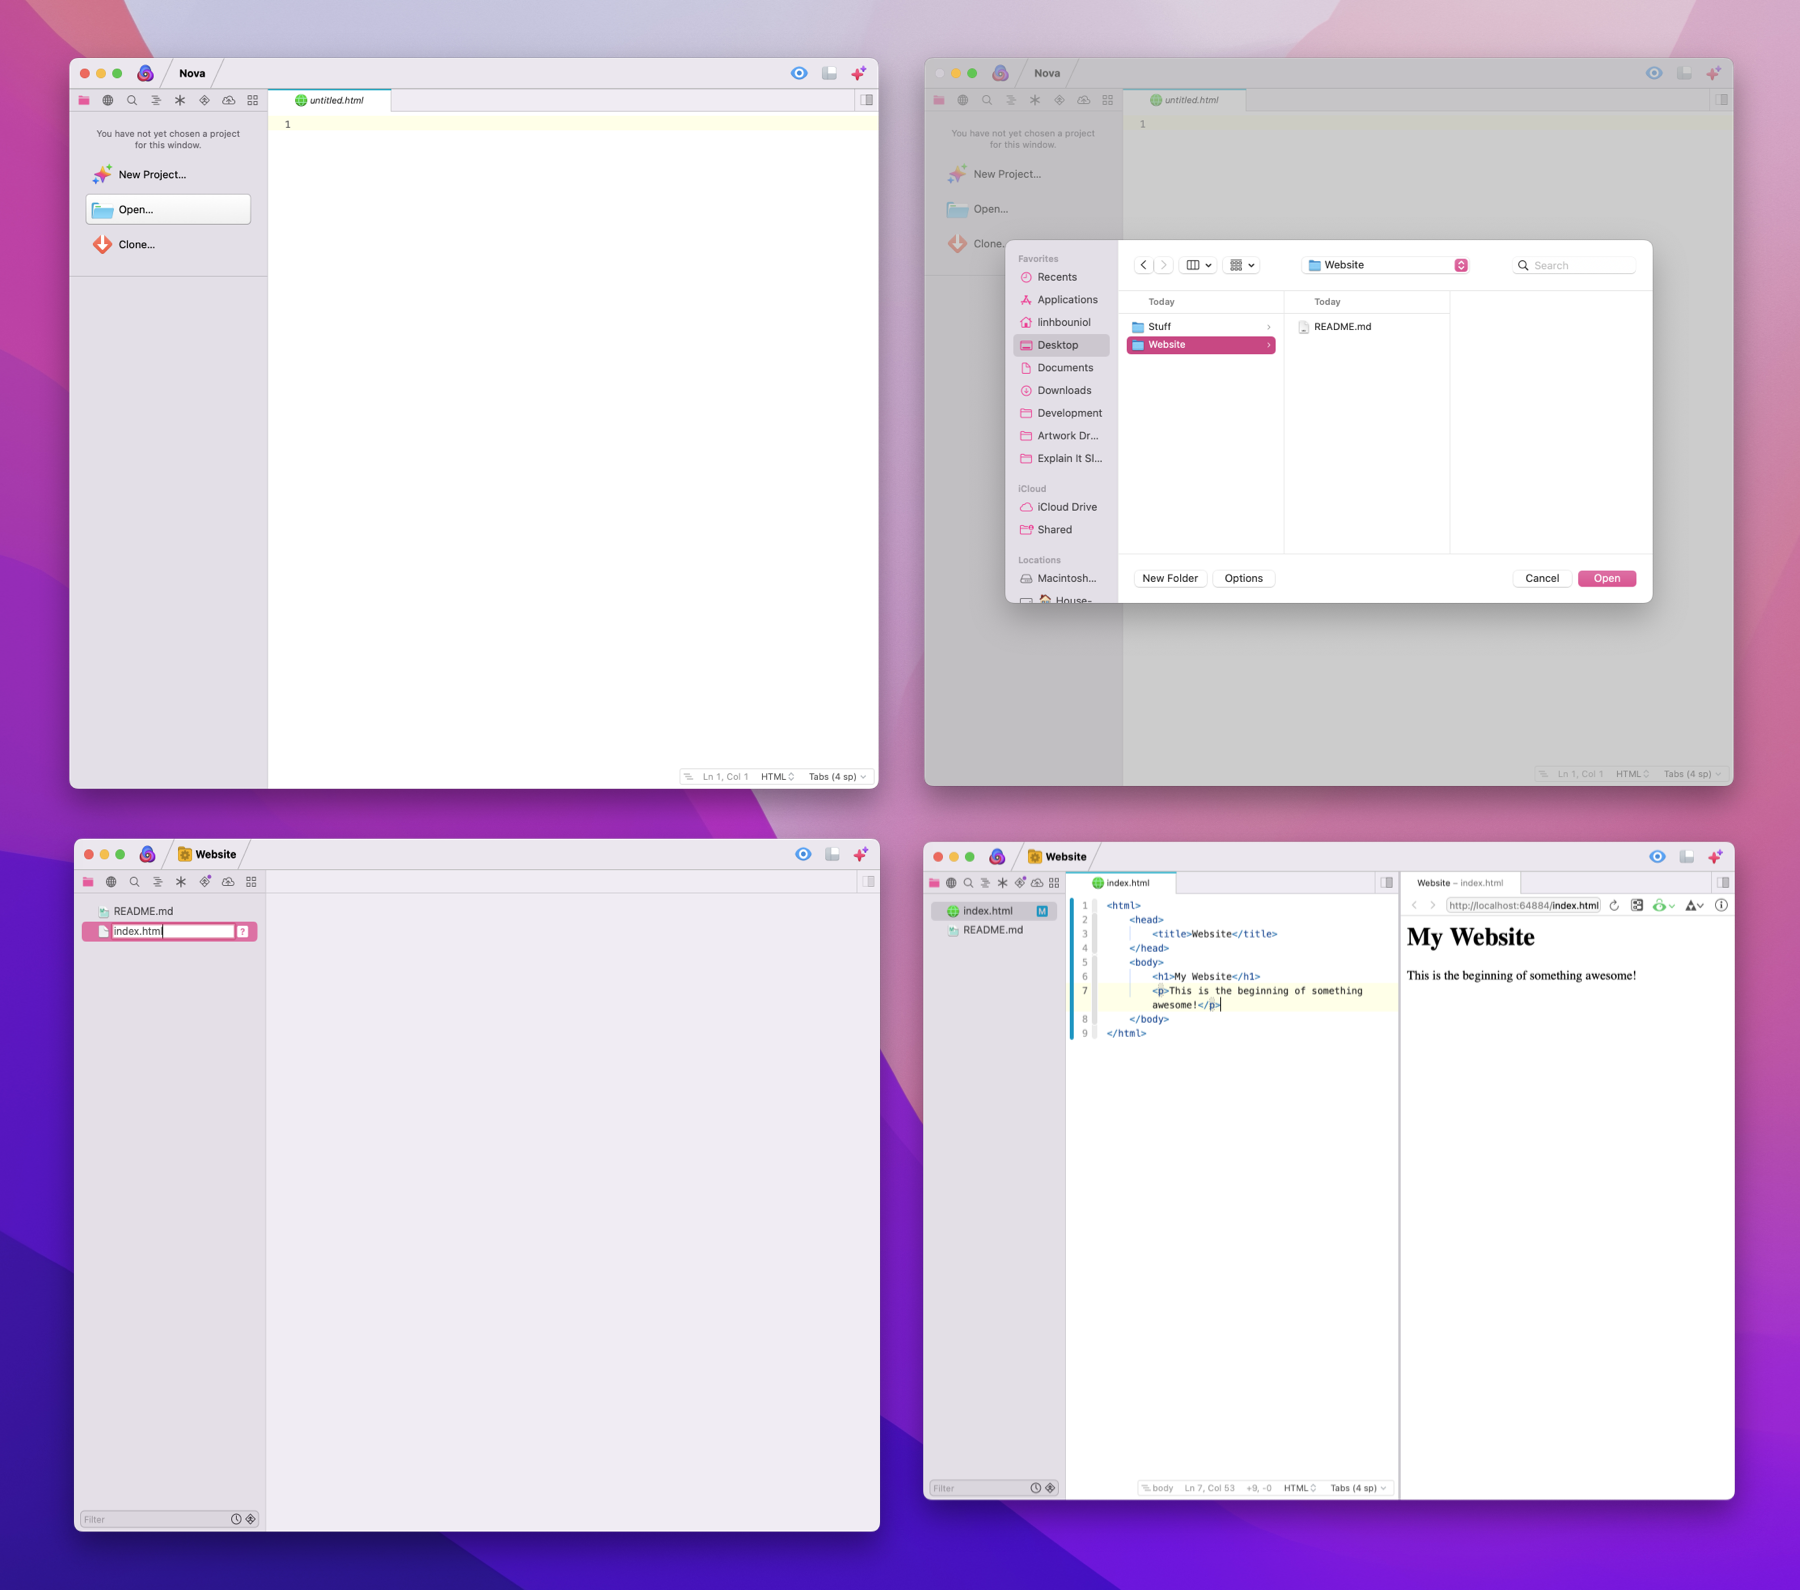
After you finish reading the books, you’re going to need a place to type the code for your website. I used an app called Nova — it is a text editor app that allows me to code and preview what I’m building side by side. This app does cost money, but I think they have a 30-day trial period for you to test it out. If you don’t want to spend money, you can also use TextMate, which is free.
Once you have Nova downloaded and open, you are going to open the repo you cloned earlier in there. Next, you’re going to create a new file and name it “index.html”, this is the file where you will write the HTML & CSS.
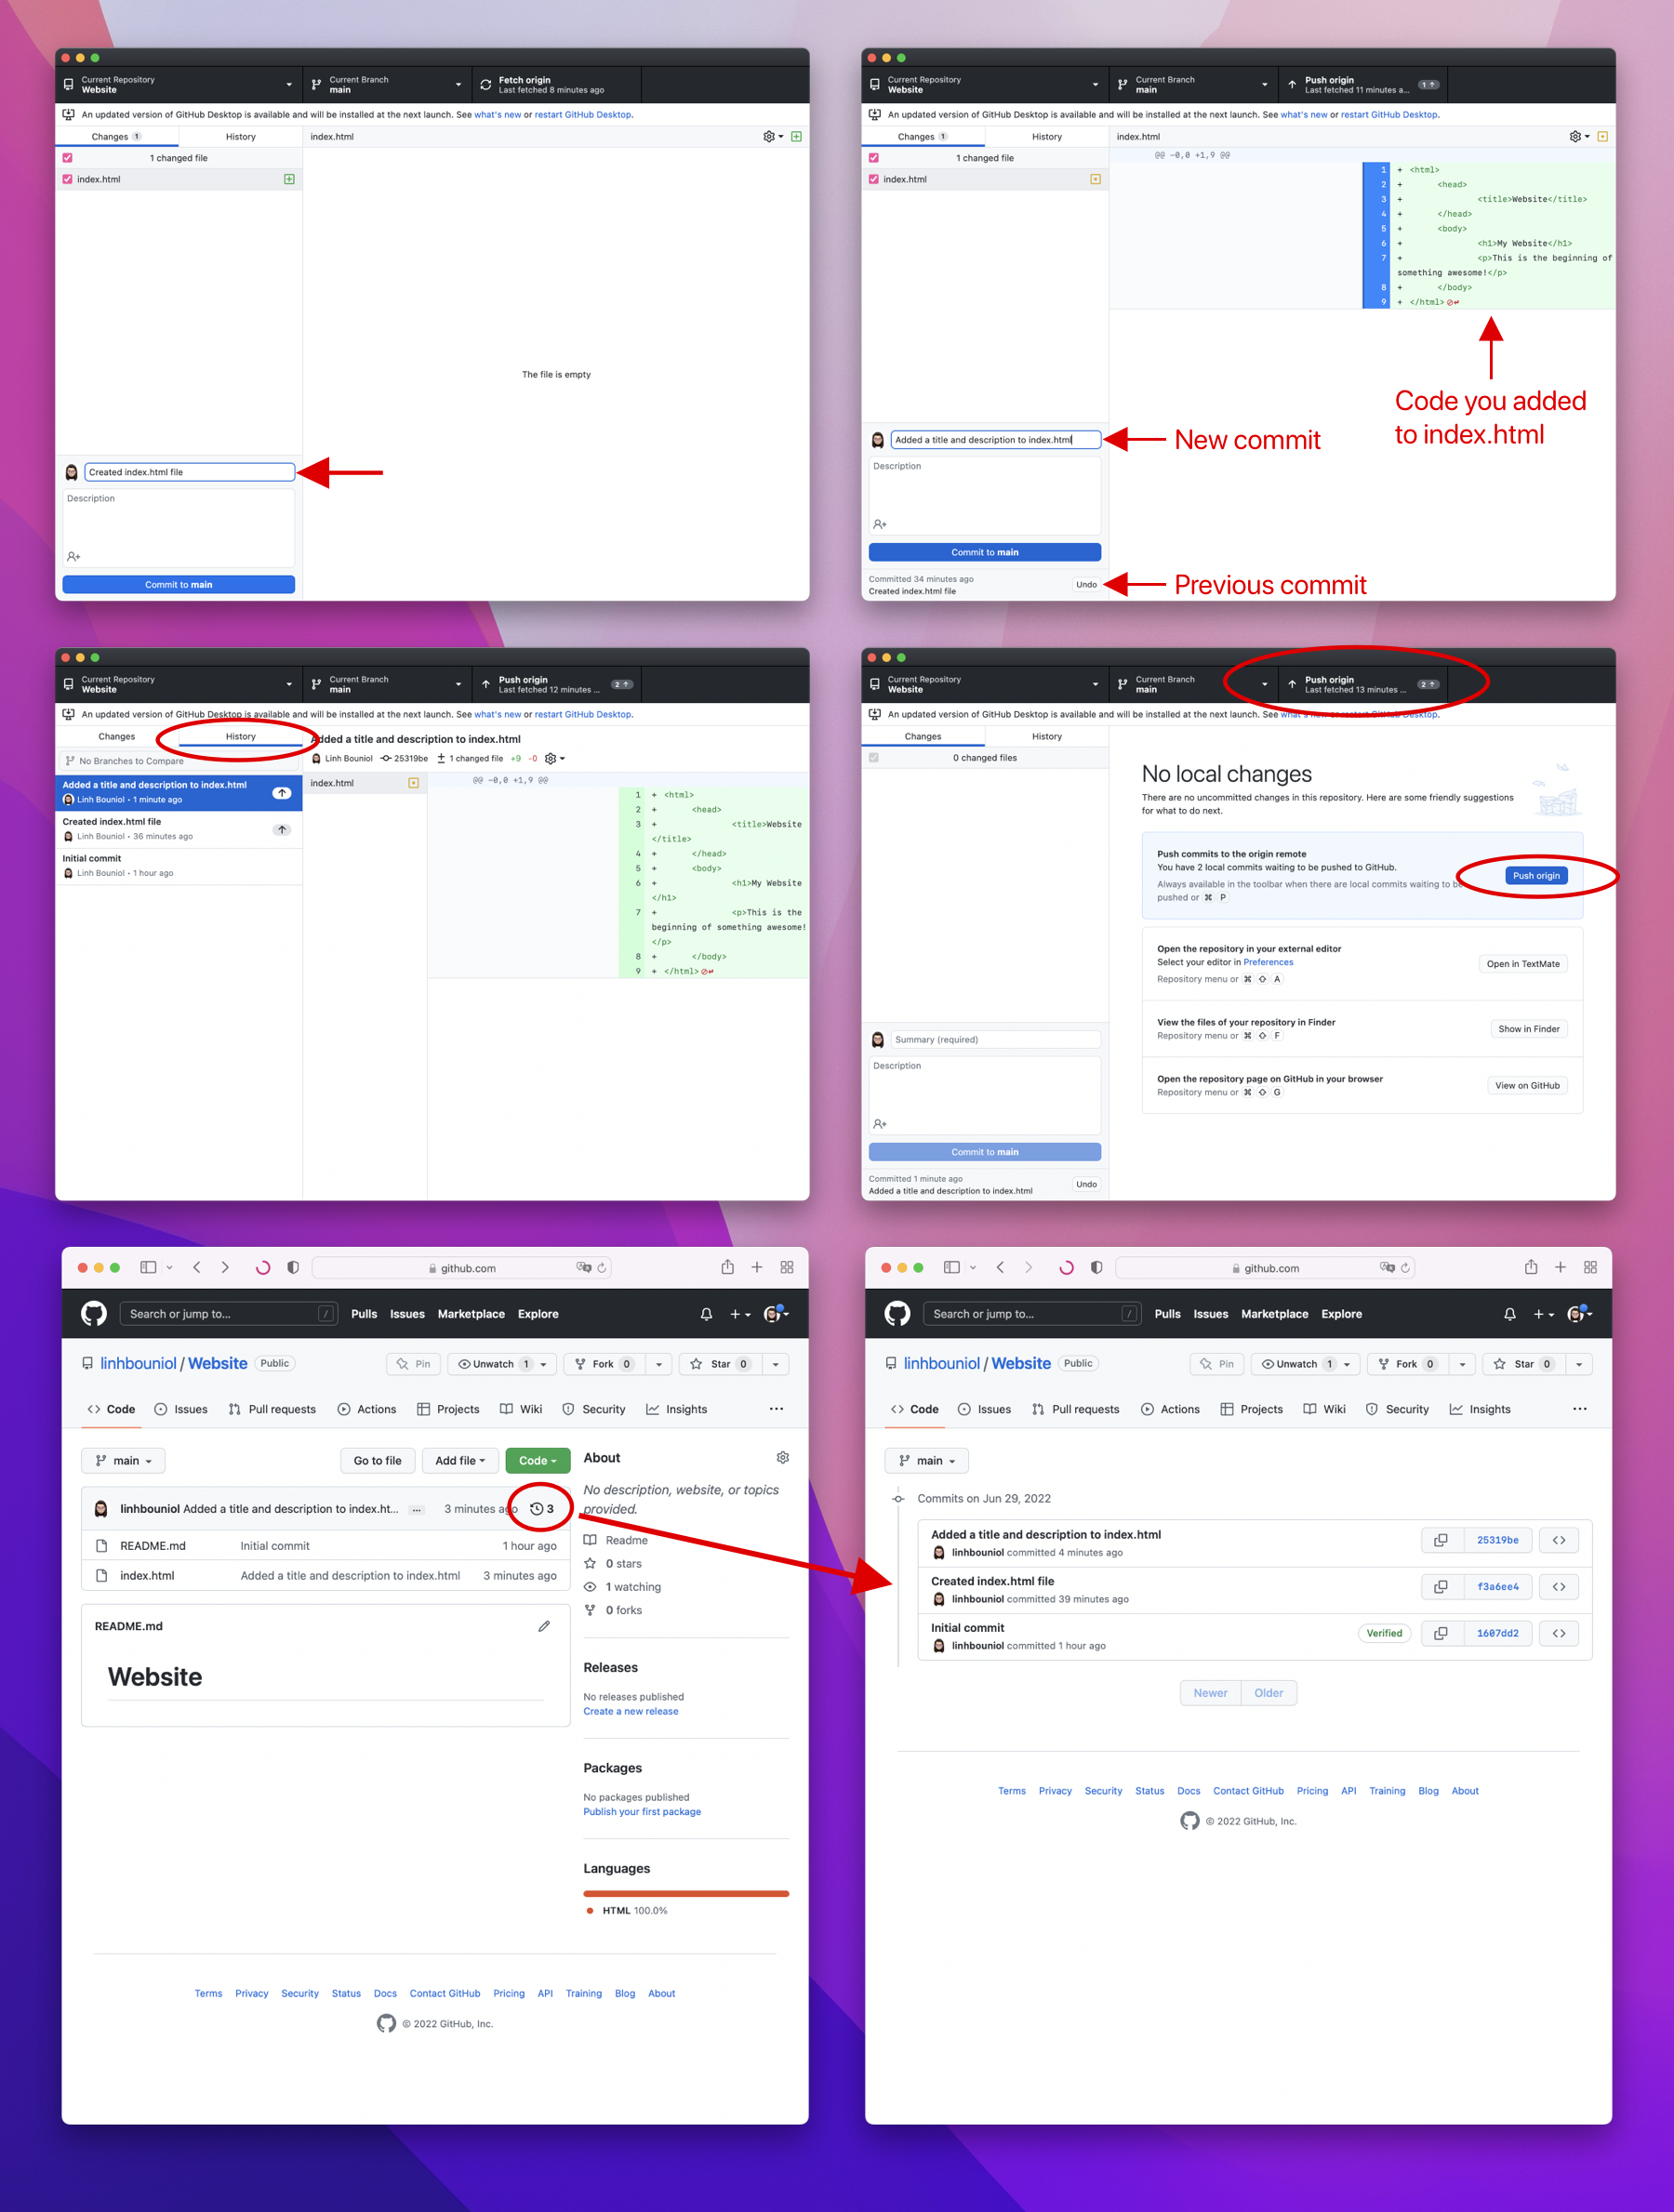
Commit and Push
As I mentioned earlier, any changes you make to the repo, GitHub Desktop will know about, so if you return to the GitHub Desktop app, you will see “index.html” that you created in Nova show up there. Before you write any code, lets commit the changes. To commit, you need to give it a commit message that describes what you did. Every time you add a file, add some code, fix a bug, move files around, etc…, you’ll want to commit it. A good habit is to commit as often as you can, because over time you will build up a history of changes, and if you ever need to go back and look for something specific, you will be able to find it with the commit message. After you commit, you need to push your changes to GitHub. So far your commits exist only in the repo that is on your computer, the repo that is on GitHub doesn’t know about all the changes. You have to “push” those changes up and you can do that from within GitHub Desktop.
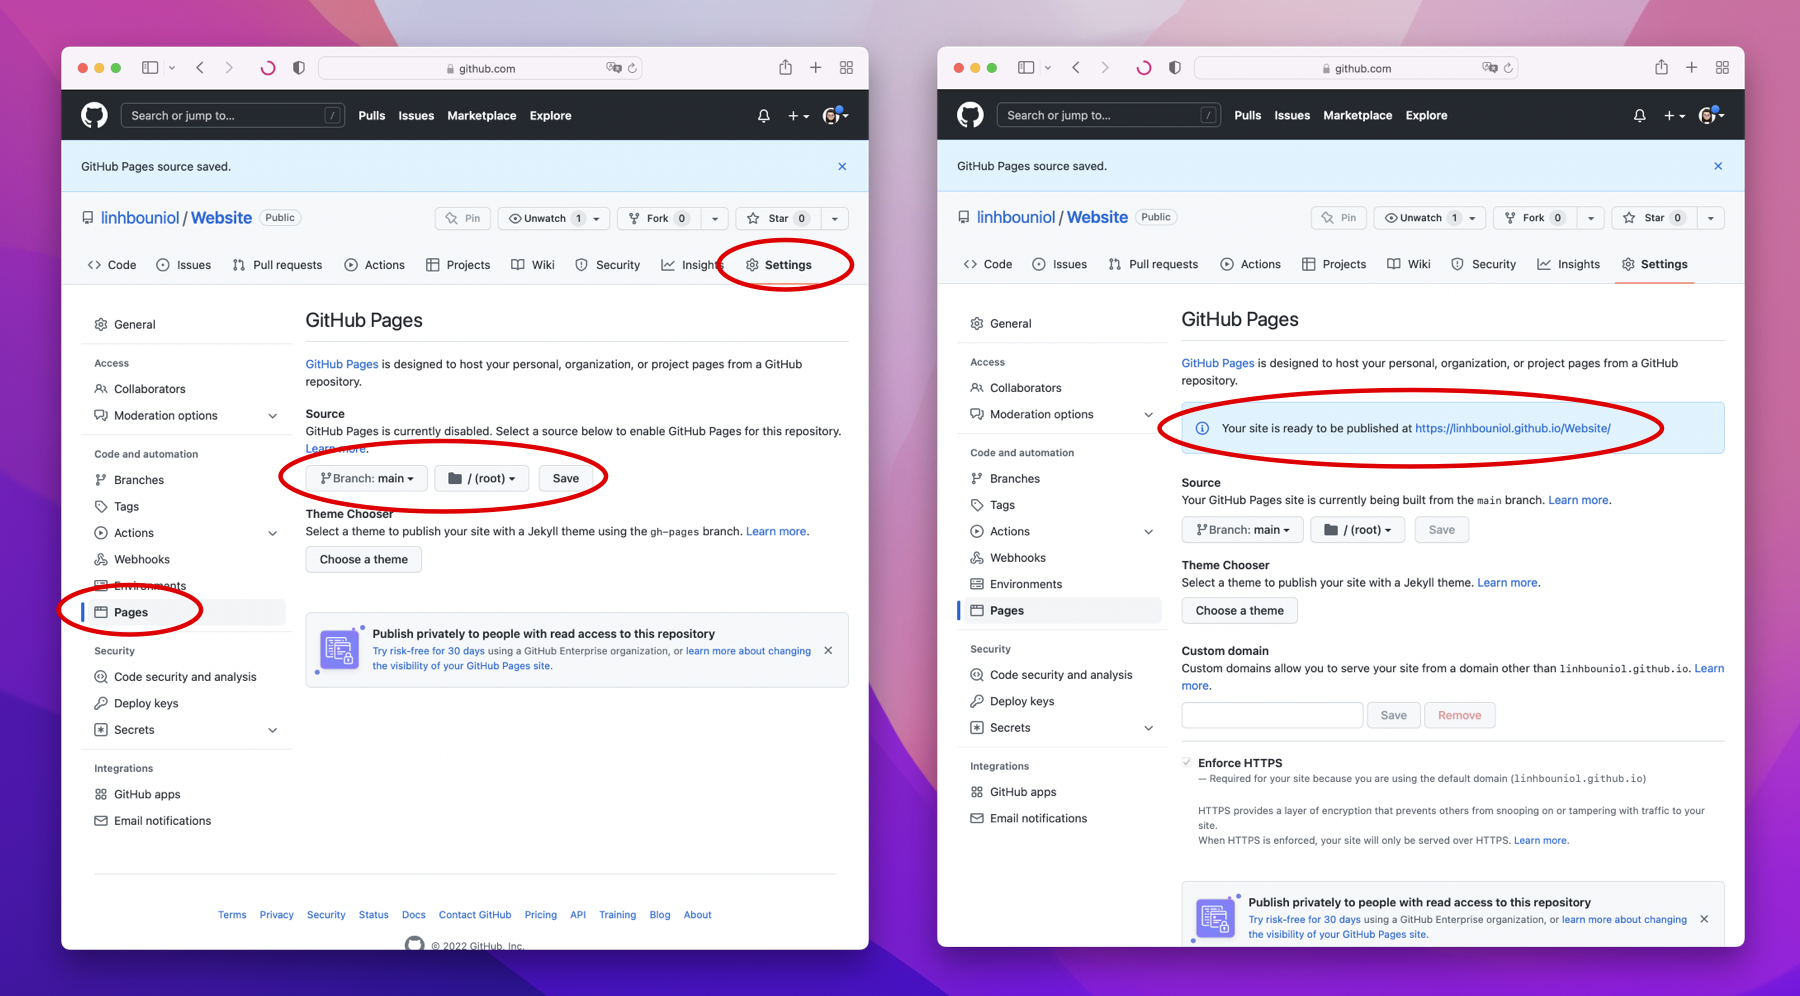
Set up GitHub Pages
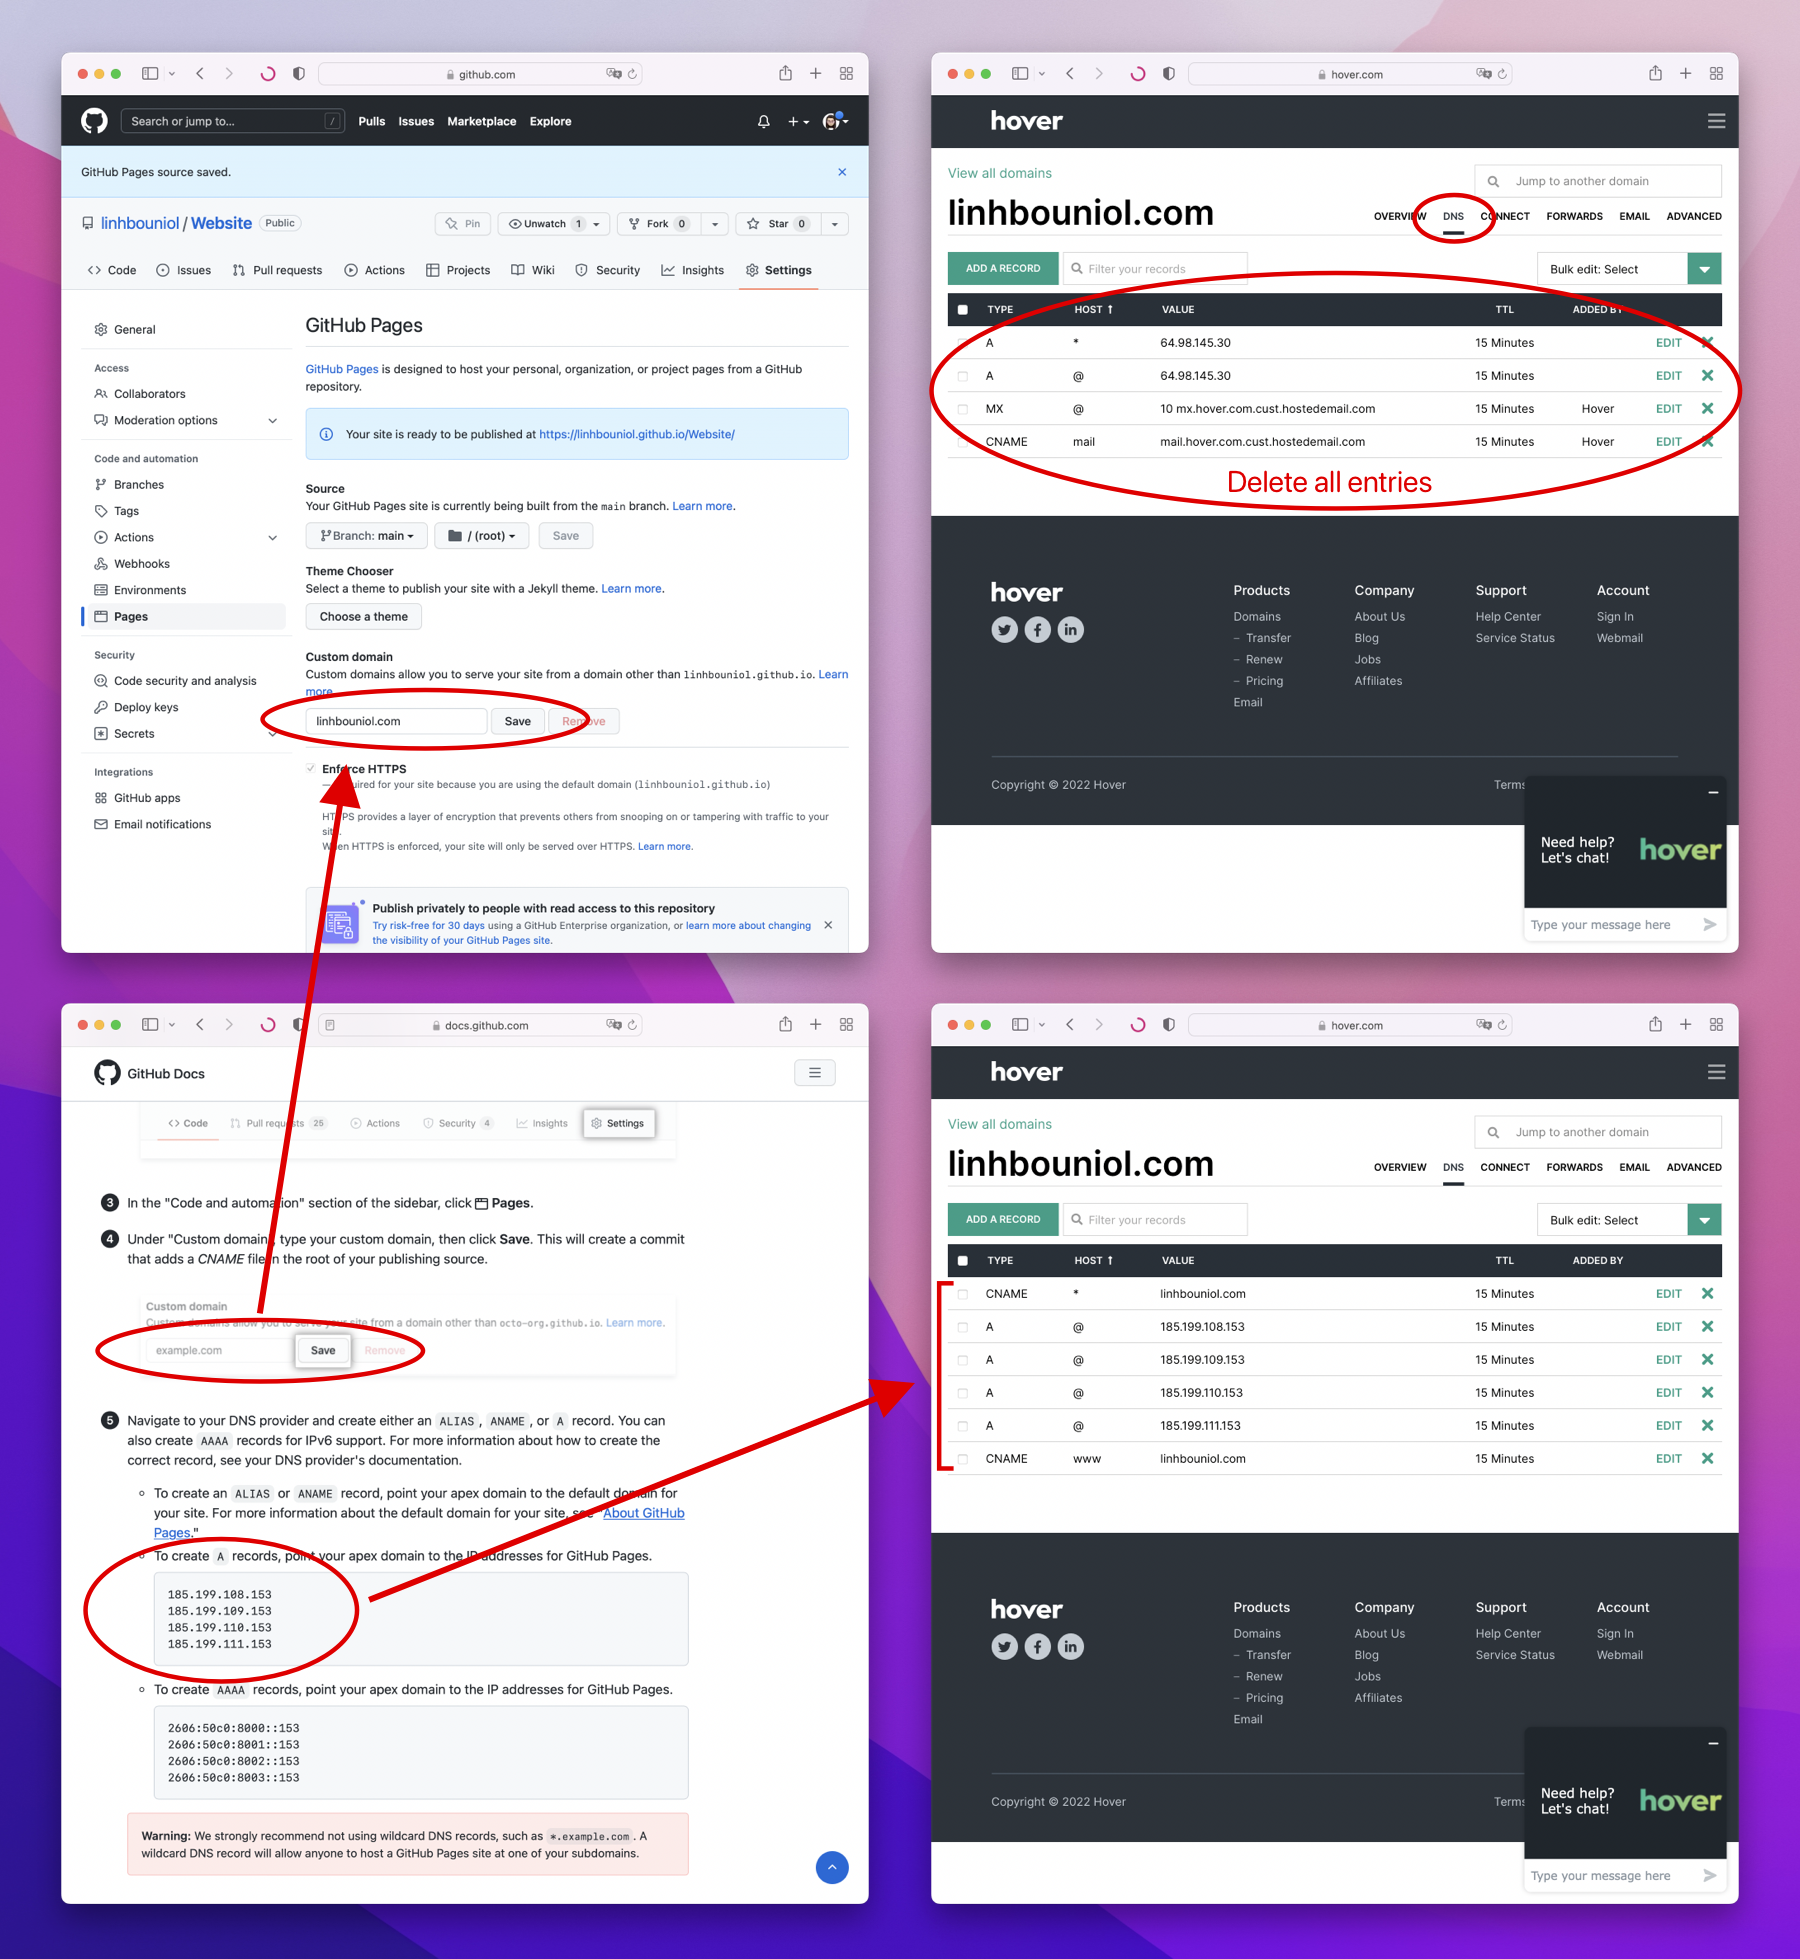
After you’ve finished creating your website, go to GitHub and navigate to your repo. Set up GitHub Pages in Settings, and it will generate a URL for your website. If you paste that URL into a search engine, you can see your website live. At this point, you are pretty much done except for one minor detail: the GitHub generated URL is a bit long and isn’t very good looking. If you want a different URL, something that is more fitting with your brand, you can purchase a domain name and link it to GitHub Pages. Every time the domain name is called, it will redirect to the website that exists on GitHub Pages under the hood and show the website as if it came directly from the domain name.
Get a domain name
A domain name is the name of your website that people can type into a search engine to find you. It can be anything as long as it represents your website or product well. You can purchase a domain name on Hover.
Once you have a domain name, follow the instructions on GitHub to configure it. You need to add the domain name to GitHub Pages and configure its DNS on Hover. You will want to delete all the existing values in the DNS tab, and add the necessary IP addresses for GitHub Pages under that domain.
Congratulations on building your own website! This is an accomplishment and you should be proud. If you find this article useful, do share with people you know.
Please support me by downloading Not Phở and help spread the word! Thanks!